
Stellartone has released their new Tonestylers for 2012!
Stellartone has released their much anticipated ToneStylers for 2012. If you haven’t been exposed to the awesomeness known as a ToneStyler, it is a modern technology interpretation of what is traditionally called a vari-tone, which are circuits originally seen in a few vintage Gibson guitars, like the ES-345, but have also been a popular modification for guitars and basses ever since.
A vari-tone is a completely passive tone shaping circuit, that requires no batteries to work. Passive tone shaping works a quite differently than modern active tone circuits, as it is subtractive to the sound only, just like a standard vintage tone control. In other words, when a passive tone control, vari-tone, or ToneStyler is turned up fully clockwise the circuit is in bypass and has no effect. As you turn down (anti-clockwise) the control shelves high frequencies away from the signal, making the tone darker.
One of the limitations of a standard passive tone control is that you have to select a single capacitor to be used in conjunction with a potentiometer to build the control. For example, most basses passive tone controls are wired with .047mfd cap. On a standard passive tone control, the value of the capacitor determines exactly which frequencies are going to be affected, while the potentiometer is controlling the depth of that cut. The basic idea for the vari-tone is to have a rotary switch change out the capacitor values to change the frequency cut-off point for the tone control.
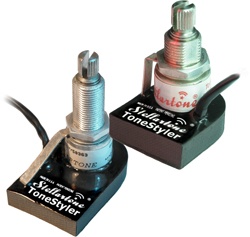
For their rendition on the vari-tone, Stellartone built the ToneStyler on an aerospace quality 16 position rotary switch. In my opinion they are a vast improvement over the 4 and 5 position old-school rotary control normally used. Theses particular switches are incredibly durable, have a much longer service life, are more compact, and offer more capacitor settings than previously possible with the standard rotaries. The ToneStyler can be used in conjunction with a tone control or in place of one. With the Tonestyler and a tone control in the setup you’ll notice more control of the cutoff frequency and depth of the cut respectively. The ToneStyler includes the common .047mfd capacitor setting, but also smaller and higher values as well. The capacitor values range incrementally across the 15 settings of the ToneStyler with all the common values, and all those in-between providing the utmost in flexibility.
The darkest setting on the bass ToneStyler of .1mfd is a personal favorite of mine. It cuts well in to the midrange, creating a ‘if it was any darker it wouldn’t actually work’ tone reminiscent of Motown, 50’s album cuts or Dub/Reggae styles. Passive tone shaping at it’s best.
What’s your favorite setting going to be?
— Max
Technical details:
Tonestylers now come in a carbon fiber enclosure which is lighter and more durable than it’s epoxy enclosed predecessor. They also now have fewer models to choose from, and this had made selecting a Tonestyler much simpler. In fact, other than the long-shaft version typically used for carved top guitars, there is now basically just a single model for guitar and another model for bass.
 You can be assured that every possible measure has been taken to ensure that the quality of the product has been maintained and exceeded. For example, there are no longer separate models for split and solid shafts. Instead, all new Tonestylers are split shaft, but come with a groundbreaking high-quality split shaft to solid shaft conversion kit. This makes any Tonestyler compatible across a broader range of instrument and knob types. Want to use your Tonestyler with 1/4″ shaft knobs like traditional Jazz Bass knobs or Sadowsky knobs? No problem. Prefer knobs that go with the more European 6mm shafts like the metal set-screw knobs that are on most custom basses these days? No problem. Are you more into Gibson speed knobs, or Strat knobs that require the shaft to be split and knurled? No problem. It does them all. The only exception to this would be the knobs for the tiny 4mm shafts found on Warwick basses and Glockenklang preamps. The knobs intended for Warwick’s and Glockenklang’s are still too small for the Tonestyler. Beyond that, you can now freely use whatever knobs you want with you Tonestyler. The conversion kit gives the knob a nice tight fit regardless of knob type.
Notched Rotation:
 Another change is that all models now have the original notched rotation. The smooth rotation has been eliminated from the lineup at least for now. It could return someday, but don’t hold your breath. Many of the costs associated with producing a product like a Tonestyler have increased substantially over the last few years. Not wanting to pass that markup on to their customers, Stellartone has decided to produce larger quantities of fewer models as a way of controlling rising costs. Stellartone has had to make some tough decisions about what models to offer. The notched rotation was preferred 5 to 1 by customers, and this is the main reason for it’s continuation over the smooth. So, to some degree, past sales have been used as a ‘popularity contest’ to determine which models would continue on in 2012.
It is perhaps also important to point out that smooth rotation offered no additional sound over it’s notched brother. Many people assumed that because the rotation was smooth that there would be ‘in-between’ sounds to be found, But this was not the case. Although the smooth rotation knob wouldn’t have had the clicking detent of 16 different settings, the sound itself would still ‘jump’ as each setting was reached during the rotation of the knob.
Are You A Lefty? Left-handed players will have to make do with what would technically be called ‘right-handed’ orientation. Right-handed means you have to rotate the knob clockwise to turn the control up. Most left-handers are already pretty adept to this adjustment, as many left-handed instruments have this knob orientation. Left-handers are a pretty resilient group anyway, as they are accustomed to living in a world designed for right-handers. We promise you’ll still find your Tonestyler easier to use than a right-handed pair of scissors.
Are you looking to purchase a Stellartone ToneStyler? Shop our Stellartone ToneStyler page.


Is there a wiring diagram for installing the tonestyler bass with the exiting tone control, instead of replacing it?
That’s supposed to day “existing” tone control.
No diagram necessary, although I believe there is a standard diagrams included with the Tonestyler that shows a tone control. Some can be found on ToneStyler’s web site here as well: http://www.stellartone.com/Page.asp?NavID=156
Just follow these steps…
1 – remove the capacitor from the existing tone control
2 – connect the Tonestyler’s two leads in place of the capacitor
Think of it as a “capacitor substitution system”
Cool. If it will fit in the bass, that could give even more control. Because without the tone control pot, it would seem that the Tonestyler is changing capacitors without changing the level of cut from each capacitor, just the cut-off point. Keeping the existing tone control would allow that level control as well.
Why do you need a tone control at all? If you’ve got an amp with a graphic equaliser (or equally competent rotary EQ) why do you want to cut some of the treble frequencies coming from your bass?
Personally, I remove both tone and volume controls from my basses, get as much tone out of them as possible, and create the sound I want with the amp’s EQ.
Otherwise you’re trying to do the same thing in two places, and wind up confusing yourself. Pretty much the same goes for tweeter controls on speaker cabs…
Makes sense to me. I agree to a very large degree. Some people just
prefer the convenience of having a some controls on the bass. – Max
I love my tonestyler, but I agree with Steve, I would like to know if there is a way to connect the tonestyler without replacing the existing tone control, …with a switch to select each one maybe?
I check the stellartone’s link and I could find it
The best way to achieve that is to use the Stellartone micro pedal, and then you need only one tonestyler to fit all of your passive basses.
Hi. I welded the Tonestyler at the capacitors place and the only way I can make it work is by turning the existing tone control to zero. Is this the way it should be or am I doing something wrong here?