
In this build step we shape out the forearm contour. This contour is not absolutely necessary but many bass players like it because it makes for a more comfortable playing experience whether seated or standing.
Below: Guitar body, Surform file, 80-grit sandpaper, adjustable F-clamp, small sanding wood block for use as caul.

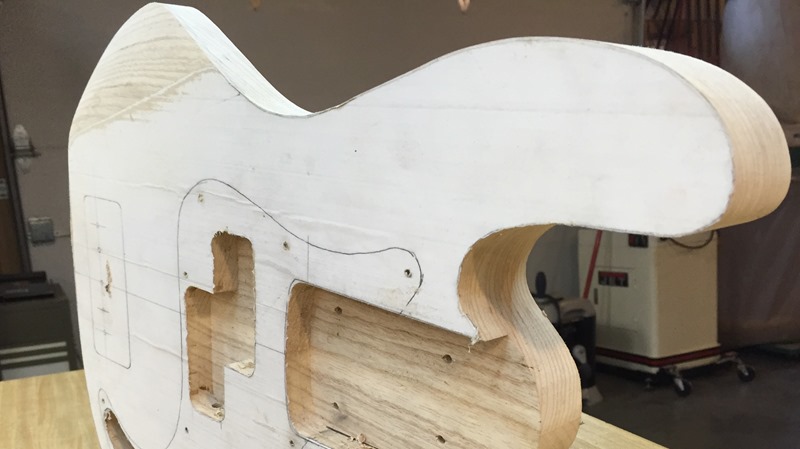
Below: The line has been redrawn for forearm cut. To note, the tummy cut usually defines where you draw the forearm line for symmetry’s sake, and you may need to redraw this line a few times to gauge it correctly.

Below: The body has been clamped to the bench at the neck pocket area.

Below: Filing begins using Surform file.

Below: Filing continues.

Below: Just about finished with the Surform filing at this point.

Below: Switching off to sandpaper.

Below: We have filed to the line, but have purposely sanded beyond the line to get rid of the file marks.

Below: Switched to foam sanding block for more precise shaping.

Below: The look of the cut after using the foam sanding block.

Below: A final view of the forearm cut.

Where are the rest of the build steps?
You can view them all here.


I have this contour on several basses. I like it if I’m using a pick, but mostly I play with my fingers and since I rest my forearm on this point, I find that with the contour that point is narrower, so the weight of my arm is balanced on this narrow point, making it a little uncomfortable. I prefer a little wider edge there so the weight of my arm is resting on a broader spot.
Hey Bob, I hear you I play the same way with my arm resting there. This little P is getting the traditional Fender treatment anyway. I’ve always thought (now retired) bass builder and master painter Tony Lacugo had the most comfortable looking forearm in the business. His design is pretty radical, but I’ll bet it’s crazy comfortable and ergonomic. Check this out…..
http://www.tdlguitars.com/BassRV.html
I do ergo beveling/scalloping on all my designs, some very large and deep. I’ve found that making a series of cuts from pencil-mark at the side to pencil-mark at the top (or back) about 1/4″ apart will guide the removal of wood so it remains level. You can even use a sharp chisel to remove the majority of each ‘slice/wedge’ before flat-filing. Once all indication of the cuts is gone – the bevel is as deep as you wanted and still flat. This works especially well for a belly scallop where it is curved/dished.