A few weeks ago Evan gave a video guide to prewiring an Aguilar OBP-2 Bass Preamp. Today Best Bass Gear tech Max is going to pickup where Evan left off and install that same preamp.
Tools You Will Need:
- Aguilar OBP-2 Preamp
- Heat shrink Tubing
- Solder iron
- Solder
- Tapered Reamer
- Washers
Step 1: Removing the previous pickup
The first thing we need to do to get the old pickup out of there. After you unscrew and pull up the pickguard, just cut free the pickup leads and the ground leads from the bridge.
Now it’s time to take the controls off the pickguard. It’s best to have a variety of wrenches so that you can get the right fit. On the bass we are working on the control pots are 10 millimeters, while the output jack is 12 millimeters.
Step 2: Adjusting the pickguard
Now we take the Aguilar OBP-2 preamp Evan prewired for us in the previous video. It comes with a bunch of nuts and washers, but we are going to take those off and put them to the side for now.
What we want to do first is check each part of make sure that they’ll fit in the pickguard. We can see that two of the holes are going to need to be enlarged, so we do that with a tapered reamer. Work slowly and check your fit frequently to make sure you get the best fit.
Step 3: Mounting the controls on the pickguard
The pickup we’re working with is fairly simple. It’s just a master volume control, a bass/treble stack, and a jack.
The bushing on the stacked pot is a little longer than we’d like because we are mounting it in a pickguard. To adjust for that I could just take an extra nuts and put it on the back, but in my experience those tend to loosen up. So what I’ll do instead is put a stack of four lock nuts behind it.
It helps the fit of the knob set if you get that right.
Now we’ll do the same thing for the volume control. The bushing is a little long, so we’ll use four locknuts.
And then we tighten everything up with a half inch nut driver.
Step 4: Connecting the preamp
Now everything is secure and we can start to connect the preamp. Thanks to Evan’s prewiring this is really easy. It’s basically just two connections.
Off the jack is a short black wire for attaching the bridge ground wire. We strip, expose, and twist that together. Then we add the pick grounds right to it, grounding everything with just one solder connection.
Slip a piece of heat-shrink tubing onto the wires, solder the connection, and heat that tubing to protect the connection. We just used a lighter for a few seconds to shrink the tubing.
The only other connection we need to make is the pickup wire. We don’t even need to strip this wire, it is what they call a push back cloth wire. Make sure you put another piece of heat-shrink tubing on the wire to protect the connection.
Evan leaves this small piece of wire where the input should go, and if you’re uncomfortable soldering with a potentiometer you can solder something to that wire. It’ll make it easier for you. And if you’re inclined you can remove that wire and just solder the pickup wire right to the tab on the pot.
Now just connect up your 9-volt battery to the battery clip and your preamp is connected and ready to go.
Step 5: Fitting everything in the cavity
Now for perhaps the trickiest part – fitting the preamp in your cavity. It’ll fit, you just have to be patient and work with it. For this preamp we have a taller concentric pot that we have to work around.
You may find that you have to rotate some of your parts to get things to fit. In this case I’m going to rotate the jack. We also just slightly bend some of the tabs for the best fit.
It is a little bit tight. But it definitely will fit.
Step 6: Testing, testing, testing
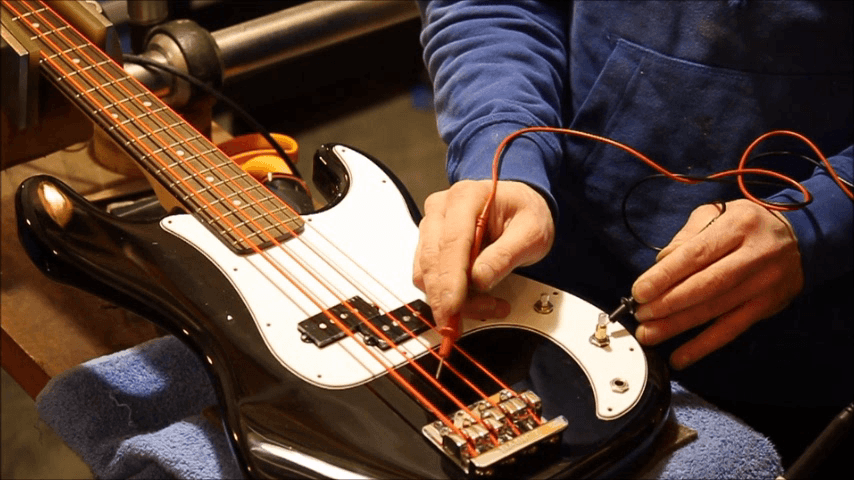
Now we just test the function of each control and make sure everything is good. Use an electrical meter set to the connectivity stetting.
It’s worth mentioning that the orange strings that this young player has on his bass – which are DR coated strings – are actually coated with an electric insulator. That means that while ordinarily you’d have conductivity across the strings, here we do not.
I should be able to test across every component in the bass. Our bridge itself is testing for conductivity, as it should. But while it should then make contact with the strings, in this case it is not due to the insulating coating of the strings.
That means that even though these strings give the player the look they are looking for, it’s not doing it any favors in the noise department. You can hear that when you turn up the high frequency.
It gets significantly quieter when I touch the controls. That is what it’s supposed to be like all the time when you’re touching the strings. What I’m going to do is recommend to the player that if he is concerned about the amount of noise that he gets when he boosts the high frequency, then he can try different strings.
And that’s pretty much it for installing a preamp. We got it on the pickguard, connected it to our bass, and tested it to make sure everything is working perfectly. Now it’s good to go.


Changing the battery requires removing the pick guard and reseating the wires and preamp every time? I think a battery compartment is essential to make this work.
You’re one step ahead of us Jeff. An upcoming video guide is all about battery compartments.
I’ve become a big beleiver in the merits of the bigger rout. Most strats with the small rout have a dull sound to them (some are great, anyway). Tyler also uses a bigger rout. Oh, and the first thing Ed Reynolds in Austin does when he gives a strat a facelift is the make the rout bigger.