
This project’s original inception occurred after working here at Best Bass Gear for the past year and a half and seeing Max’s ThunderCaster that Chris Stambaugh built for him. The lines and Gibson esque Thunderbird styling along with the Hammon Dark Star Pickups is what caught my eye so I started out to build my own styled after Max’s original drawing. Max was kind enough to provide an outline of the build on vellum for me to work off of for my project.
Tools, and Materials had to be sourced and I picked up only the most basic tools to perform the build as I have access to a few friends tools when needed and a shop to perform some of the work, and various hand tools and equipment from past years.
Tools
-
A Skil Router. 1 ¾” HP with ½” and ¼” collet ability. Roughly $70.00
-
Router Bits. I purchased these from Stew Mac, a single ½” and 3/8” bit with 2 additional bearings for each. Roughly $50 or $60. CMT Bits, as well as getting flush trim bits with a bearing of adequate size and heat resistant tubing to keep the bearing held down would also work.
-
Neck Pocket Template. Purchased from Stew Mac along with binding tape to handle the oversize .004” nature of the template.
-
Jig Saw. Free, borrowed from a friend. Used to cut the body.
-
Air Compressor and Orbital Sander. Free, borrowed form a friend. Used for the majority of the sanding, shaping of belly, and forearm cut and general cleanup pre-finishing.
-
Tape Measure, 12” Ruler, 6” Ruler, Small Level and DryWall Square.
-
Various Sandpaper for Orbital. Grits 40,60,120,220, & 400. These also used on Sanding Blocks both hard and soft as they are adhesive backed.
-
Sanding Blocks. Two Foam & One Rubber. Large and Small Foam for getting around bends & corners. Large Rubber hard block for Body Top.
-
Pickup Template for Delano Xtender4. Purchased for $9.00 at Best Bass Gear. Acrylic will serve to build an MDF, and retained as master template.
-
6” Wood Rasp for rough shaping of the belly cut, and forearm cut.
After acquiring all the tools and access for the tools I required, I set about shopping for wood. Locally there are a few Lumber Yards in the Tampa Bay Area that have access to both Local and Exotic Species of Hardwood. I ended up using Intercity Lumber of Tampa Bay as there selection and service is superb. I chose a Mahogany board that was straight and had little to no cupping, and measured 15.5” Width, 2” Thick, and 36” Length with simple grain pattern and little to no knots. 3 ft Length was chosen so the board could be nicely planed down to 1 ¾” overall thickness. Price was around $35.00 with onsite milling work done. Not bad when getting a nice piece of lumber and not having to have it shipped.

Body Drawing

Mahogany Board
Materials were slowly sourced and I settled on using an Allparts Precision Bass Neck purchased here from Best Bass Gear. For the price the quality on the neck could not have been beaten, and investing any further money into tooling necessary to handle fretting the instrument was out of question on the first build. Neck has 21 Frets, Vintage Tint Finish (which is quite nice), Ebony Fingerboard, Abalone Inlays, 11/16” Head Stock Hole, and Truss Rod Adjustment at the Heel.
With neck in hand, body wood purchased, and enough tooling to start about working I dove right in. At the advice of Max I started by routing the neck pocket first. This is crucial as any mistake after a body is cut when routing for the neck pocket cannot be corrected or centerline adjusted to compensate. Knowing this I spent the most time with the binding tape building up the template till the neck was snug. I made one test pass for fitment and ended up arriving here.

Neck Pocket
After the first test route was completed, I moved on to handling the real pocket. With 36” of board length to work with I had plenty of room for a test neck pocket before making the body cut.
After the final neck pocket was handled and depth finished at ¾”, the body template was traced on one side and transferred over with the centerline originally created on the wood for the neck pocket.
Many, many relief cuts were made around the curved edges with the jigsaw and a Bosch XtraClean Blade until the body cuts could be made easily without any burning of the edges.
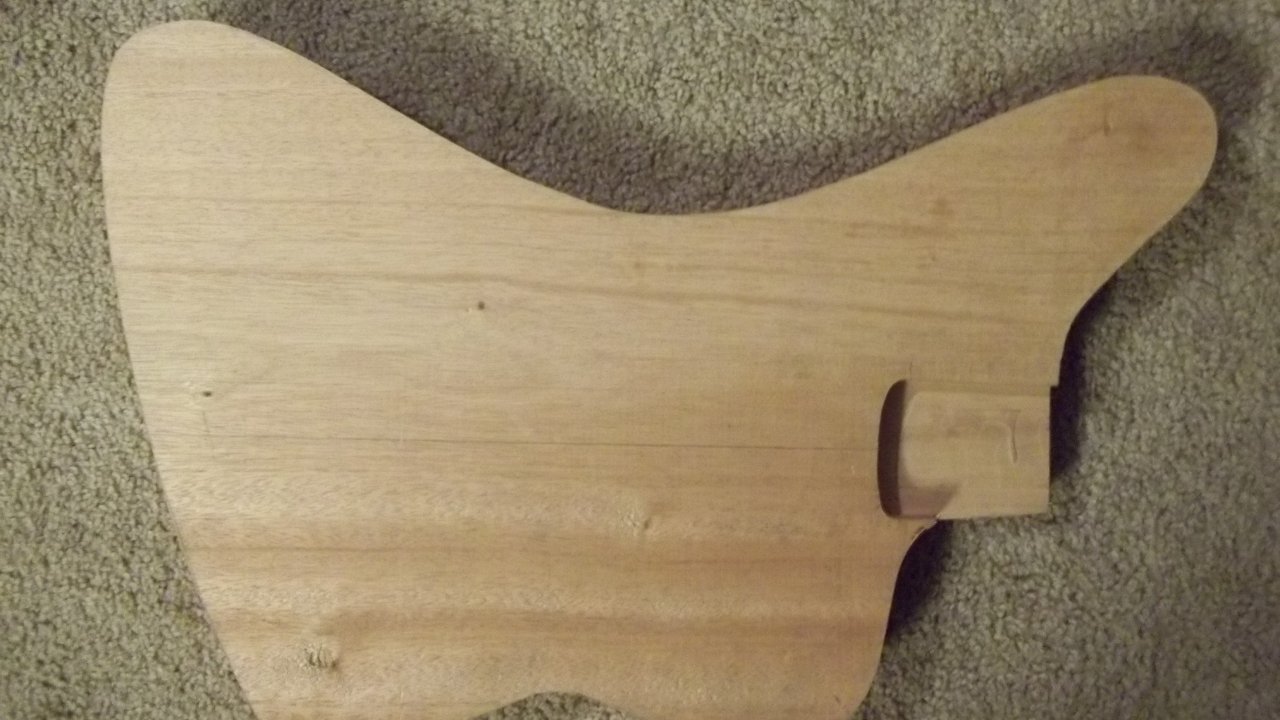
Final Results on the original body cut turned out quite nicely with using only a jigsaw and two blades total. A BandSaw would have naturally been the easier route, but this build is centered around minimal tools and a budget oriented approach.

Body Design Cut
After the body has been cut, the rough edges require smoothing with 40 grit sandpaper, and a combination of orbital and block work to get a smooth level surface. Stay tuned for more….


That is a terrific shape- looking forward to seeing its development.
I love this body design on the Fernandes Vertigos. I can’t wait to see how it looks on a bass with the delano Xtender pickups. Good choice of pickups! 🙂
Very nice and logical shape indeed. It also has a lower bout like a Bass VI…
nice design
A reverse/non-reverse hybrid T-bird shape that addresses lower fret access and neck balance – you solved 2 of the birds drawbacks and it still looks cool! subbed!