Mike Pope FlexCore Wiring Diagram
Mike Pope FlexCore preamp wiring as text: the balancer board terminals and connectors, volume board set-up, EQ board jumpers and power, from Michael Pope Design's instructional overview.
On this page
Mike Pope FlexCore preamp: how it goes together
The FlexCore is plug-together: a passive section (balancer board and volume board) and an active section (EQ board, treble board, mid boards) joined by one 5-pin harness. Pickups go into screw terminals; everything else plugs in with the supplied harnesses.
Core 1.x is dual volume (Section 1 of the manual). Core 2.x is balancer plus master volume (Section 2). Core 3.x is single pickup.
The Mike Pope FlexCore is discontinued at Best Bass Gear. See Mike Pope FlexCore preamp replacements for what we put in instead.
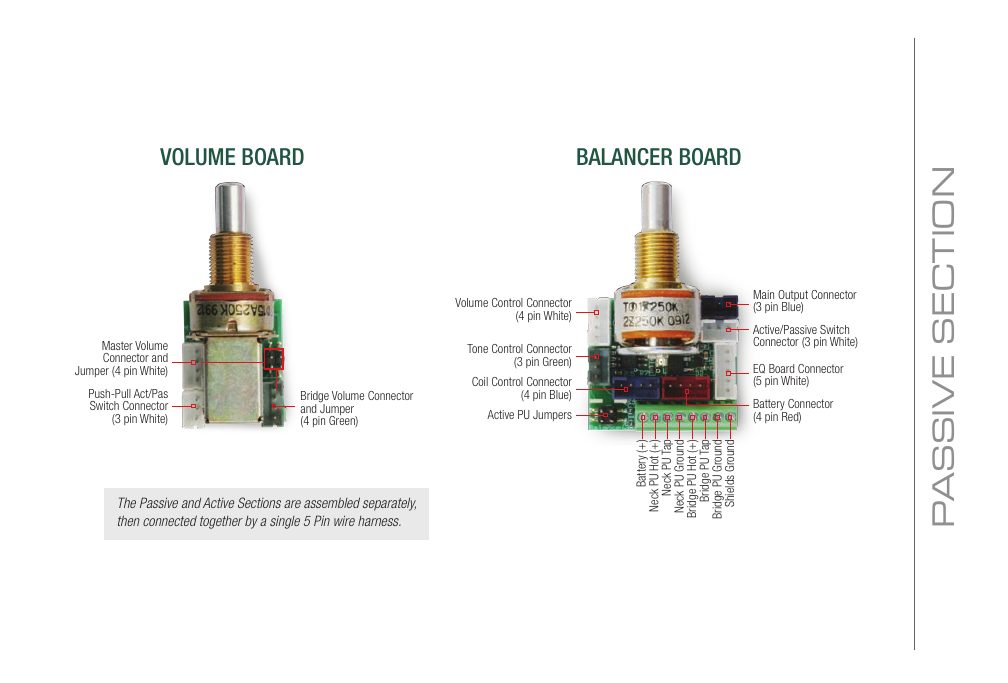
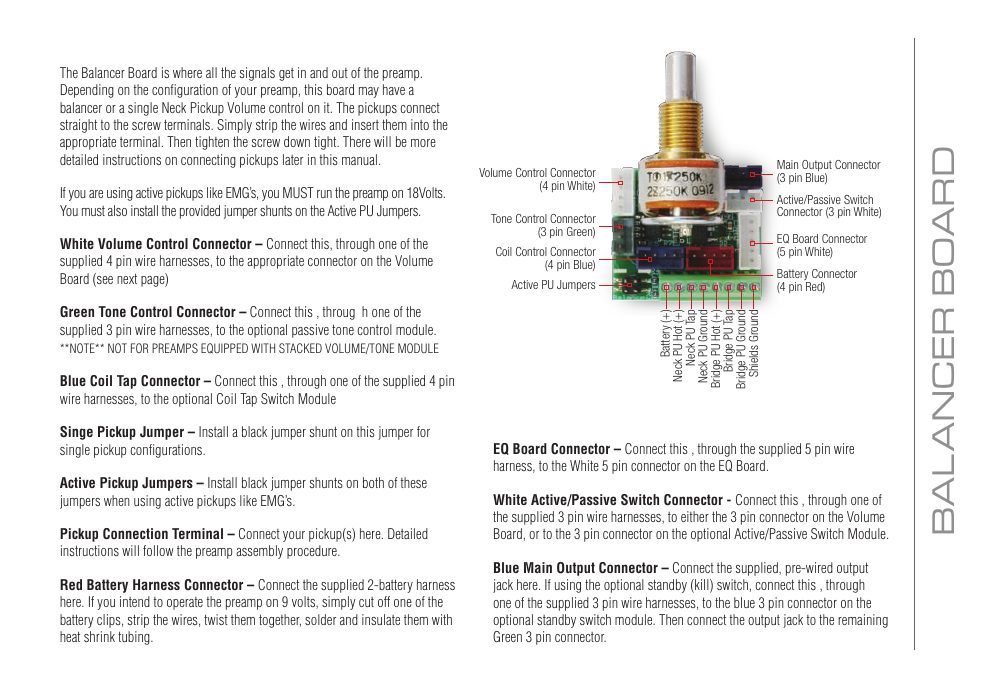
| Balancer board screw terminals | Battery (+), Neck PU Hot (+), Neck PU Tap, Neck PU Ground, Bridge PU Hot (+), Bridge PU Tap, Bridge PU Ground, Shields Ground |
|---|---|
| Balancer board connectors | White 4-pin volume control, green 3-pin tone control (not with the stacked volume/tone module), blue 4-pin coil tap, white 5-pin EQ board, white 3-pin active/passive, blue 3-pin main output (pre-wired jack), red 4-pin battery |
| Jumpers | Single pickup jumper (Core 3.x); Active PU jumpers for active pickups like EMGs |
| Power | Supplied 2-battery harness for 18 V. For 9 V, cut off one clip and join its wires. Active pickups need 18 V |
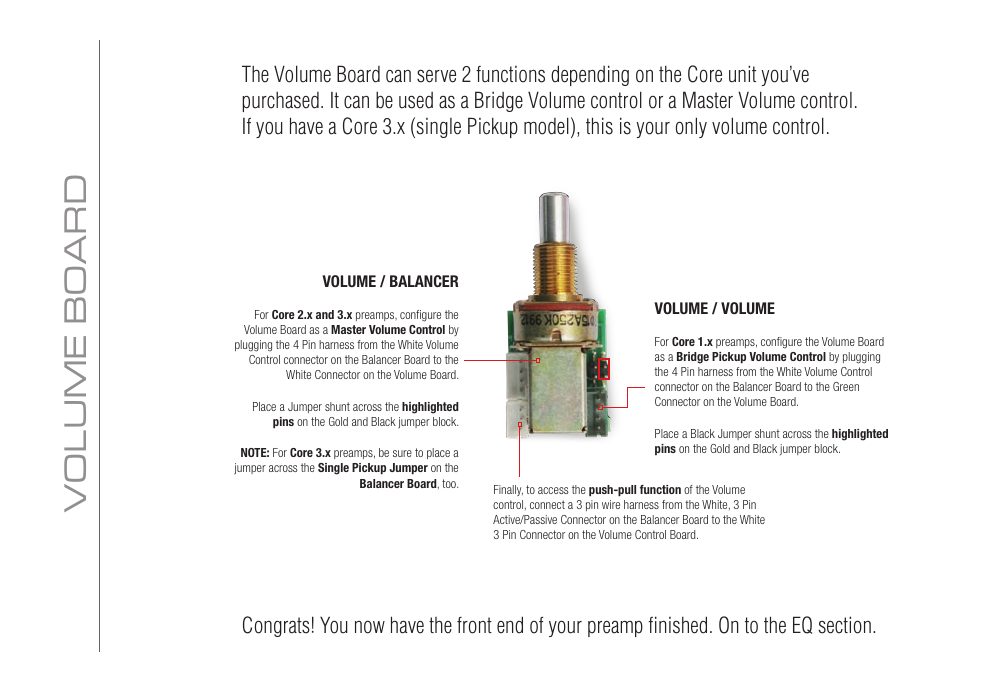
| Volume board | Master volume (Core 2.x/3.x): balancer white 4-pin to the volume board's white connector. Bridge volume (Core 1.x): to its green connector. Set the gold/black jumper as shown in the manual |
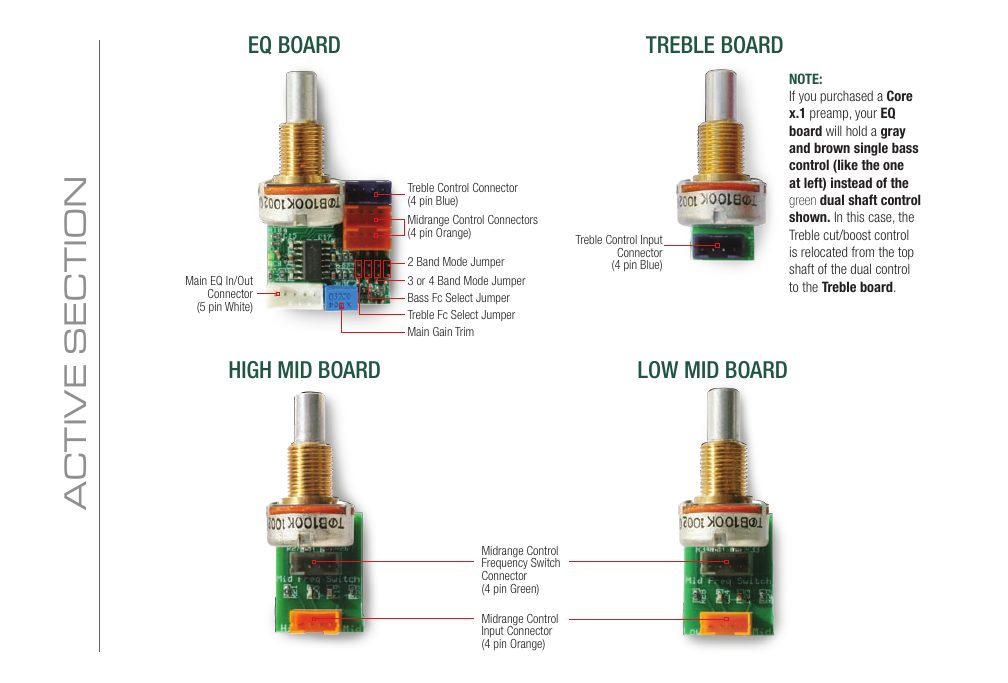
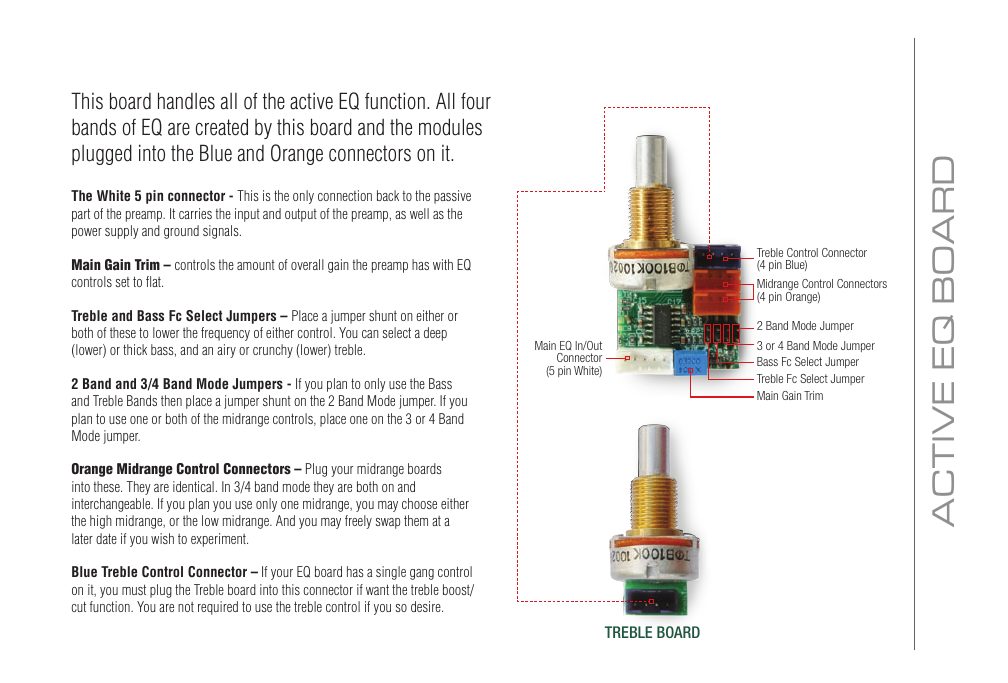
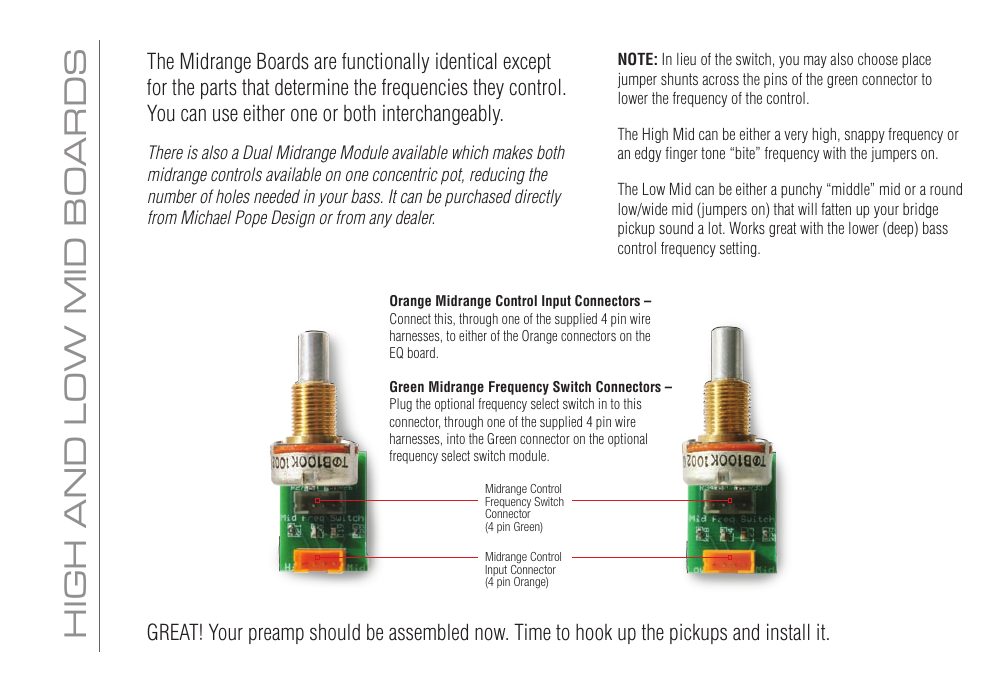
| EQ board | Main gain trim; bass and treble Fc jumpers (lower frequency when fitted); 2-band or 3/4-band mode jumper; two identical orange mid connectors (high or low mid board); blue treble connector |
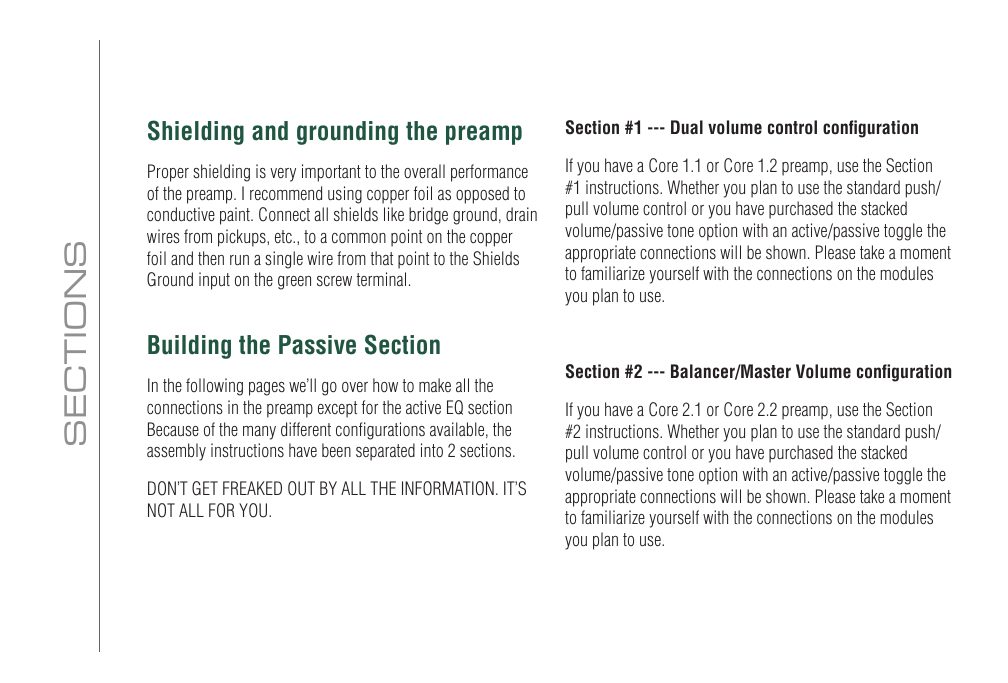
| Shielding | Copper foil, all shields to one point, then a single wire to Shields Ground |
Step by step
- Shield the cavity with copper foil and run one wire from the common shield point to Shields Ground.
- Connect the pickups to the balancer board screw terminals (hot, tap, ground for each).
- Plug the volume board into the balancer: white connector for master volume, green for bridge volume, and set its jumper.
- Connect the active/passive harness, the pre-wired output jack and the battery harness (18 V, or 9 V with one clip removed).
- Join the passive and active sections with the 5-pin harness, set the EQ board jumpers, plug in the mid and treble boards, then test.

FAQ
Can a Mike Pope FlexCore run on 9 volts?
Yes. Cut one clip off the 2-battery harness and join its wires. If you use active pickups such as EMGs, the manual says it must run on 18 V with the Active PU jumpers fitted.
Is the Mike Pope FlexCore still available?
It is discontinued at Best Bass Gear. Our Mike Pope FlexCore replacements page lists what we fit instead.